 Manual home
Send Feedback
Manual home
Send Feedback
 Print
Print
|
|
|
|
|
Place sample Oxygenscan test
- Bring the Bob into the upper position.
- Again “blow the nose”, 2x forcefully flush the connector and the tube connecting to the bottom of the Bob with air from the (60 ml) syringe to make it dry.
- Connect the sample syringe to the Luer-connector
- “wipe the first snot”. Hold a tissue under the bob to catch the first drop (this may contain some water from the tube and is not supposed to interfere with the test).
- Lower the Bob into the cup and inject until the syringe is empty.
- In the pO2 scan screen select New, fill in the sample ID, the viscosity of the Oxy ISO and press aspirate. The cup will make 3 rotations and then stop.
- As soon as the cup has stopped rotating gently and continuously press the syringe until fully empty. Do not remove, leave the syringe in place.
Press Aspirate: The aspiration of the sample should precisely set the fluid level in the cup.
In case the aspiration from the cup does not immediately catch on after fully emptying the syringe; by hand gently rotate the cup 90 degrees and back again to the previous position. This should start the aspiration-leveling of the sample.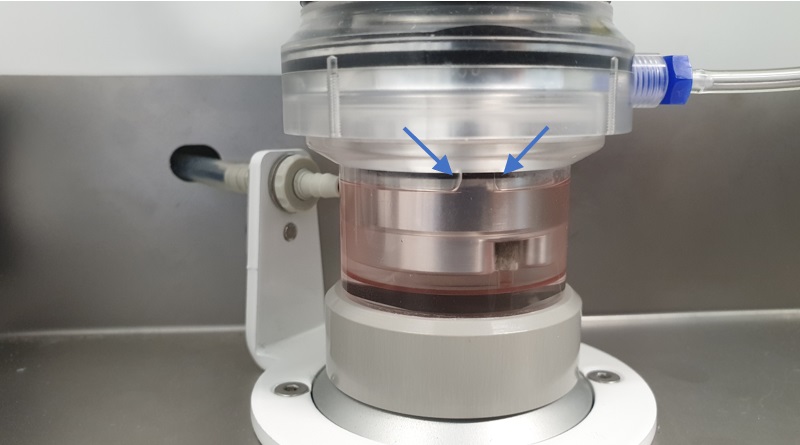
On this picture the edges around the small square are still too rounded, run the aspiration procedure a second time.
ÿØÿà
Both pictures above show sharp edges, the aspiration procedure was correct.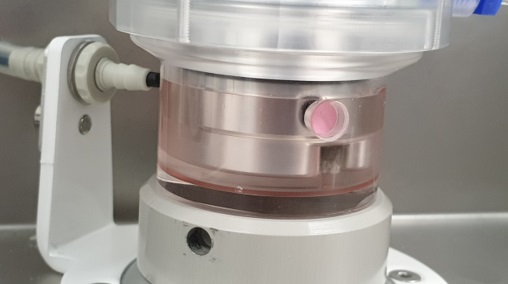
Check the leveling around the Oxygensensor spot when the cup is rotated to the left and when rotated forward.
Picture above shows correct leveling.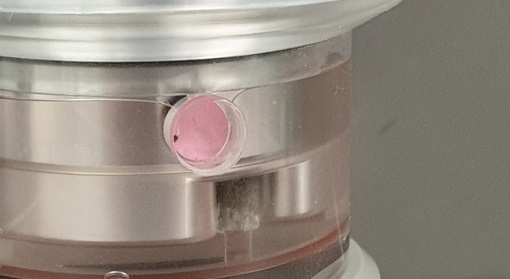
Picture above indicating incorrect leveling.
If leveling is not correct, thoroughly clean Bob and Cup with X-Clean and rub with X-Clean wetted tissue. Rinse well with DI water and rub with DI water tissue. - Close the hood
- Click Continue and Start now
Note: if the sample volume is set in accordance with the cell-count it is not necessary to change the gain setting.
See Also |
Mechatronics home
Send Feedback
Print
|
Page last reviewed: 18/05/2022 11:43:56 (Version: 5.08 (24-04-2023) MRN-231-EN) ©2022 RR Mechatronics |