Mechatronics home Send Feedback Print

Previous Topic

Next Topic

Book Contents

Book Index

Install LORC070902 tubing set 1

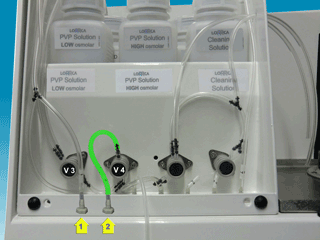
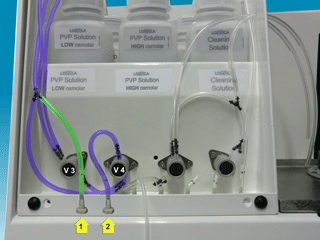
Note : Start to install with the tube end with label 2 which is shown GREEN in the picture.
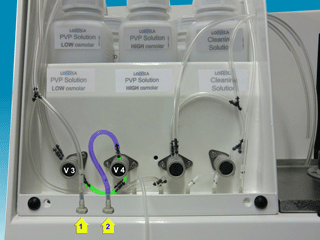
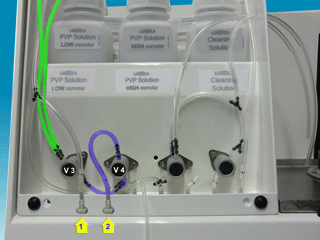
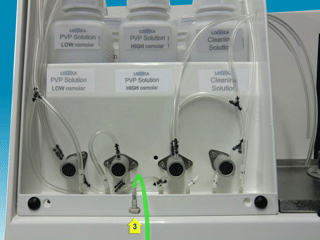
Next picture: The installed tube is now BLUE, continue with the next GREEN tube.

-

LORC070902_tubing_set_1

LORC070902_tubing_set_1

  • Put both small tubes into the pinch valve V4
  • Connect tube with label 2 on the connector 2
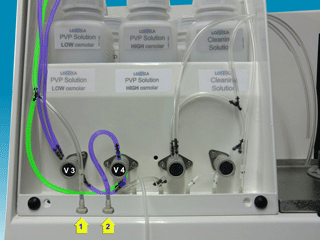
  • Put both small tubes into the pinch valve V3

LORC070902_tubing_set_1

LORC070902_tubing_set_1

  • Install both long tubes to the PVP bottles.
    • The tube with label PVP HIGH is at the back of V3
    • The tube with label PVP LOW is at the front of V3
    • Connect tube with label PVP LOW onto the bottle PVP LOW bottle
    • Connect tube with label PVP HIGH onto the PVP HIGH bottle
  • Take now the connection tube from V4 and the tube labeled H2O.
  • Connect the tube labeled with H2O onto the H2O bottle.

LORC070902_tubing_set_1


  • Connect the tube labeled with 1 onto connector 1.
  •  

Tube to needle assembly

LORC070902_tubing_set_1

LORC070902_tubing_set_1

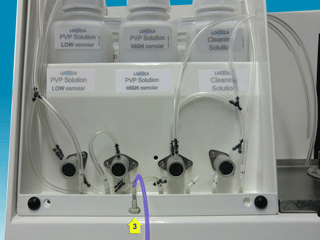
  • Connect tube with label 3 on the connector 3
  • Connect the other end to the needle assembly

See Also

Tubing replacements

Gradient pump tube replacement

Install LORC070901 tubing

Install LORC070903 tubing set 2

Install LORC070904 tubing set 3

After replacement of all tubing

To top of page Mechatronics home Send Feedback Print