 Manual home
Send Feedback
Manual home
Send Feedback
 Print
Print
|
|
|
|
|
Unpacking / Setting Up
- When setting up, take a minimum table space of 700x900 mm in account.
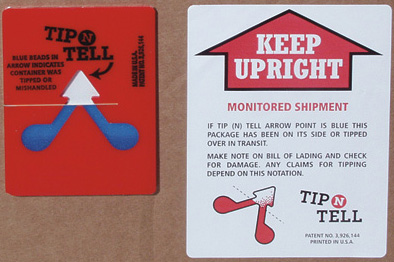
Check for damage during transport. - Check the Tip N Tell indicator if the packaging has been tipped. If so, act accordingly.
- Remove the straps from the packaging and open it.
- Check delivery for completeness;
Lorrca Reagents - Printer (if included in order)
- Lorrca Maxsis
- Laptop
- Accessory kit
- Check delivery for completeness;
- Take the Laptop, printer and monitor out of the packaging and remove their boxes accordingly. Place it on the table.
- Connect the Laptop and Printer cables according the laptop and Printer installation instructions.
- Take the Lorrca Maxsis box out of the packaging in upright position and place it on the floor.
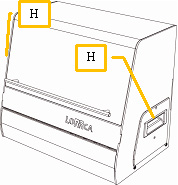
- Open the box and lift the instrument out of the box by grabbing the handles (H) on the sides (not the hood handle) of the instrument. Place it on the table.
- Remove the protective materials from the instrument (store them to reuse in case of future transport);
- Foam pieces.
- Tie-wraps.
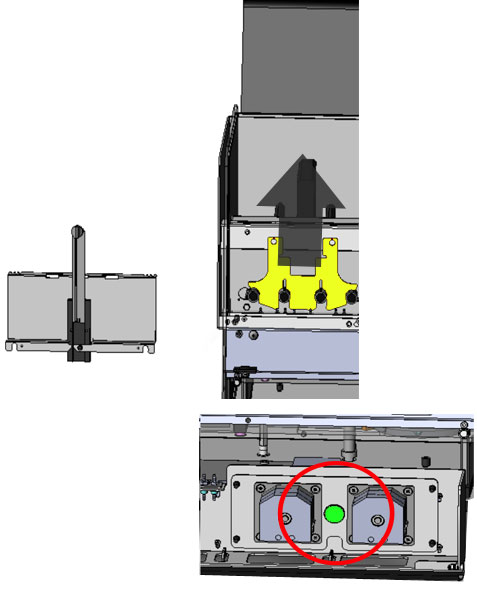
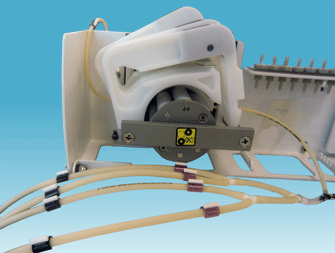
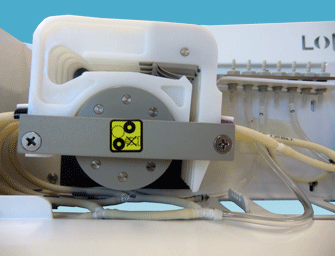
- Move safety plate on pinch valves up
- Unscrew the bolt from the pump assembly
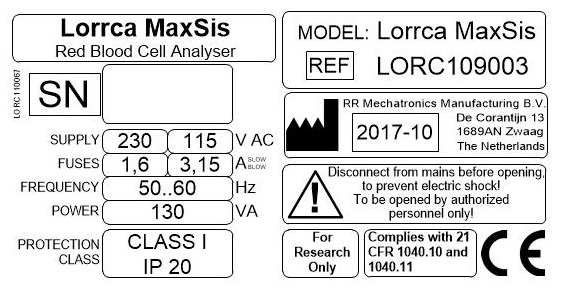
- Check/place the correct fuse (F). According ID-plate. Factory default is 230VAC. See section Replace the main fuses
- Fill the bottle de-ionized water. Fill the bottles for the Osmoscan.
- Place the bottles and connect them according the labels. See drawing LORC070020 Tubing diagram
- Place tube cassettes of the gradient pump
- Connect power cables to grounded sockets.

WARNING: Always connect to grounded wall sockets.
- Connect data cables between the instrument and PC and printer.
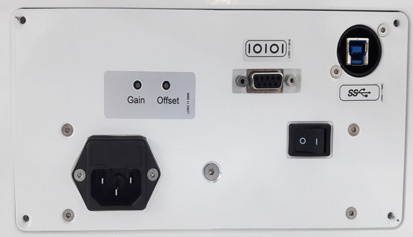
 RS232 symbol
  Connect camera connection (USB 3.0) on back panel and on the USB port at the right side of the laptop
- Connect the RS232 converter cable on the backside of the Lorrca and the left side of the laptop
- For Oxygenscan only: Connect the instrument to a N2-supply with use of the parts from the accessory set and advised additional material (see Pre-installation requirements).
The Instrument is now ready for first start-up.
Make sure you are familiar with the use of the Lorrca Maxsis, detailed instructions can be found in the electronic version of the User manual which is installed on the PC, click on the Manual ICON to get access to the manual.
See Also |
Mechatronics home
Send Feedback
Print
|
Page last reviewed: 25/03/2021 14:58:06 (Version: 5.08 (24-04-2023) MRN-231-EN) ©2022 RR Mechatronics |