 Manual home
Send Feedback
Manual home
Send Feedback
 Print
Print
|
|
|
|
|
WI-224 Level 3 maintenance
Work instruction Number 224 (PDF-version) |
|
Page 1 of 8 |
Purpose: Maintenance level 3 |
Safety: Bio Hazard area |
|
Instrument: Interrliner |
Revision: 004, 2019 |
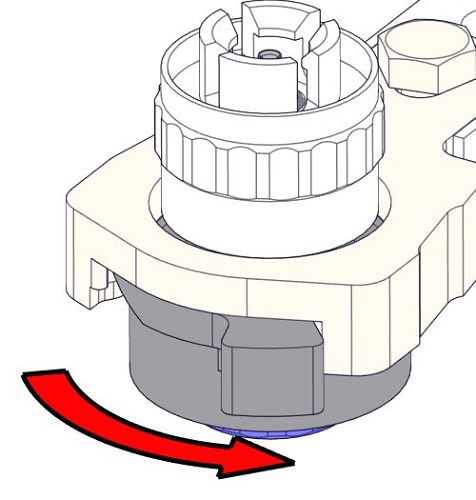
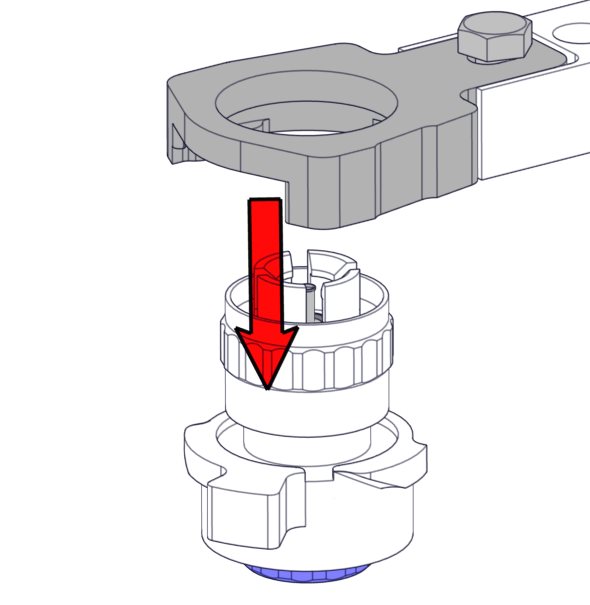
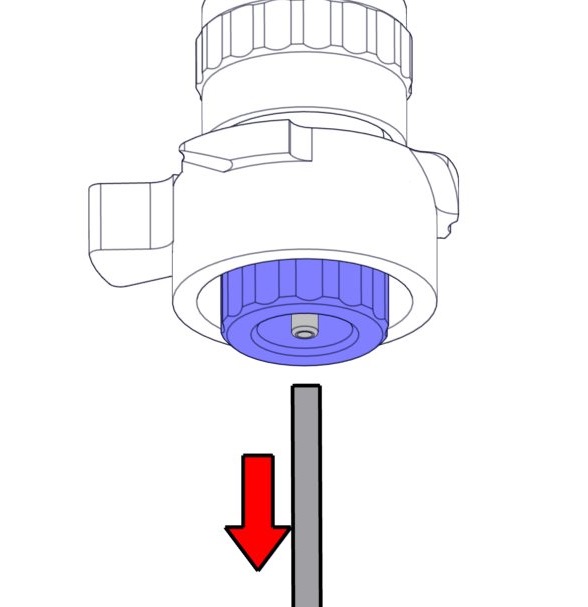
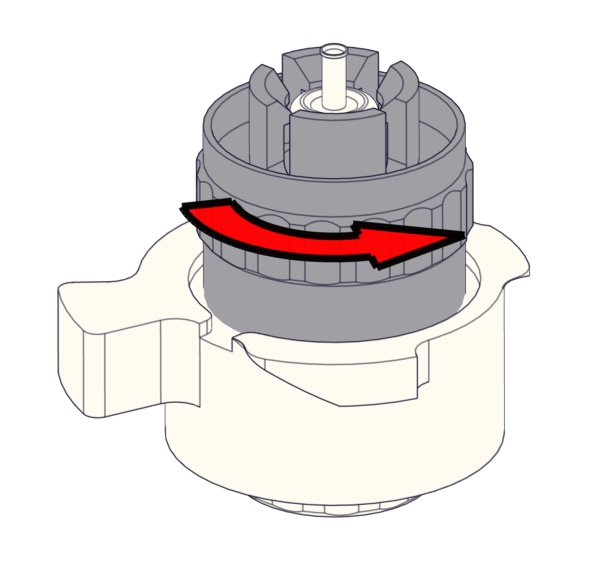
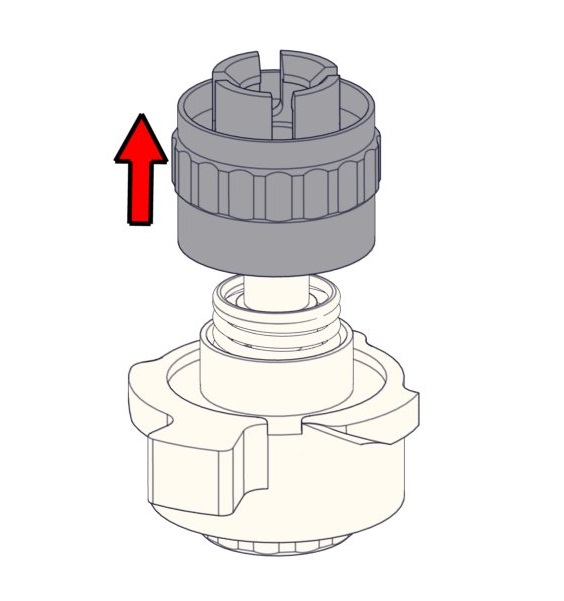
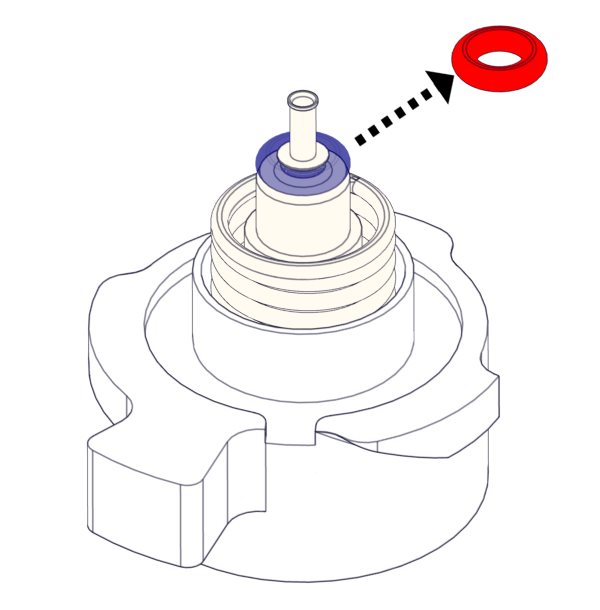
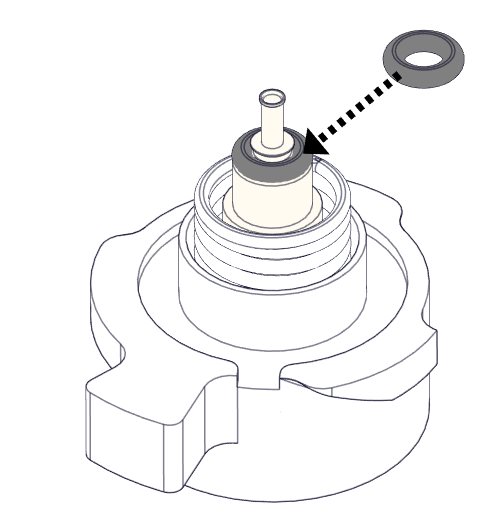
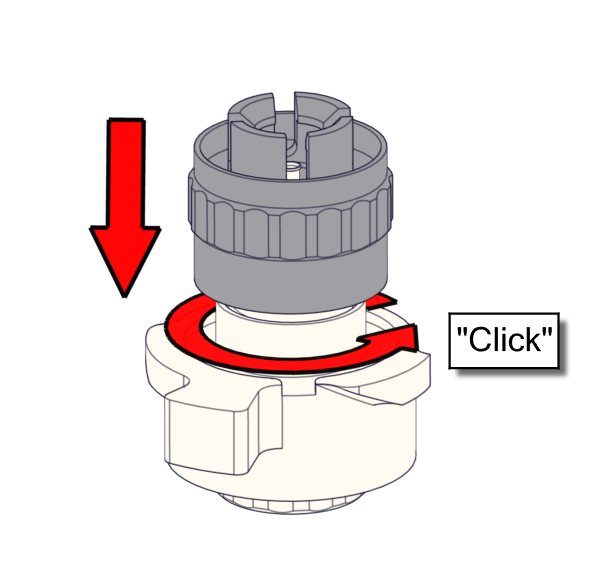
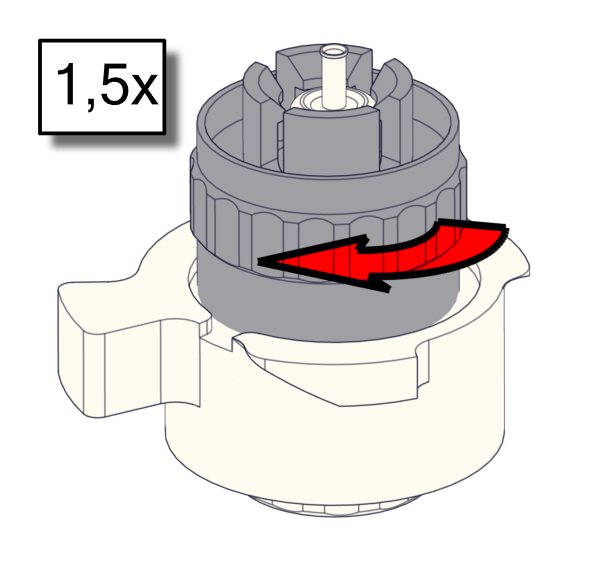
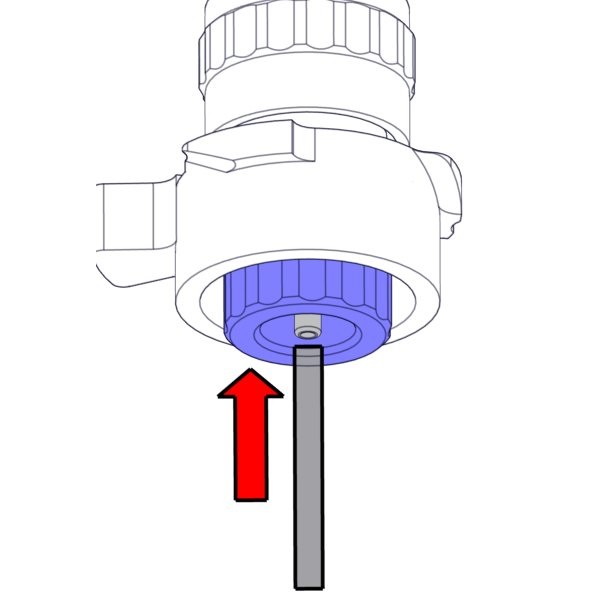
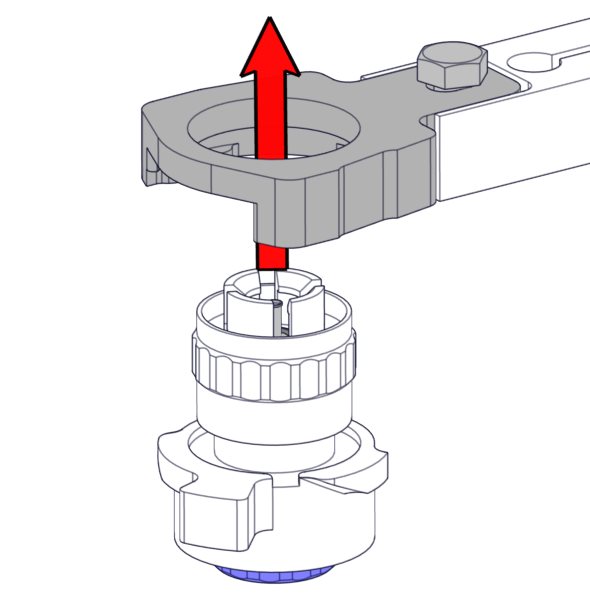
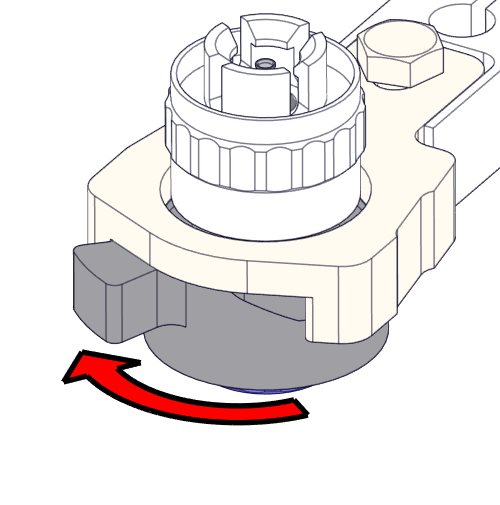
Clean Fill nozzle and exchange O-ring Fill Nozzle
1. |
|
2. |
|
3. |
|
4. |
|
5. |
|
6. Clean fill nozzle The use of a toothbrush and detergent is recommended.
|
||||
7. |
|
8. |
|
9. |
|
|||
10. |
|
11. |
|
12. |
|
|||
13. |
|
|
|
|
|
|||
Exchange bacterial filter
On waste bottle (If used):
Exchange bacterial filter QWLV040001 on the waste bottle assembly.
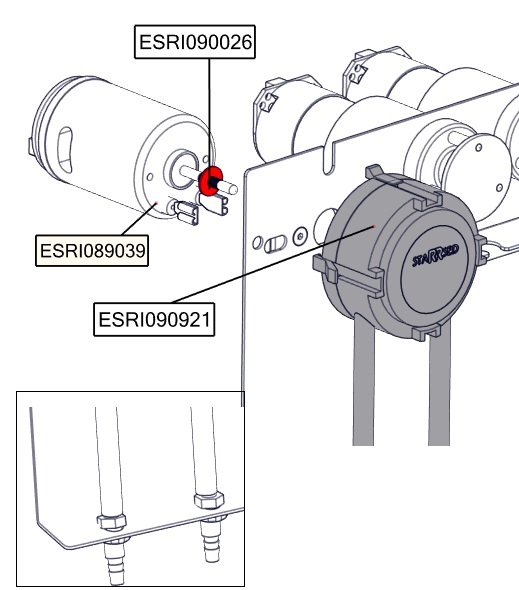
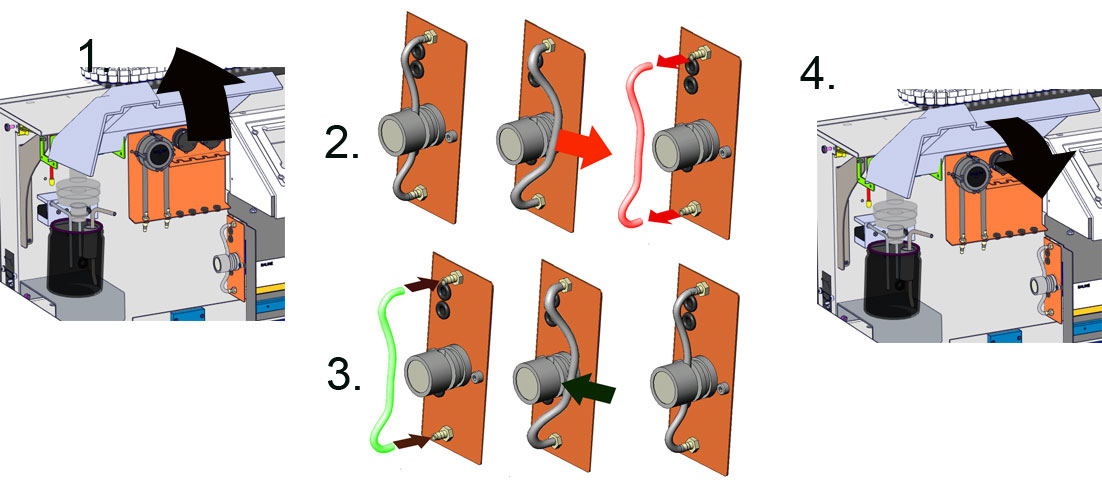
Exchange Rinse and Saline tube assembly |
|
New rinse pump tube assembly ESRI090902.
|
New saline pump tube assembly ESRI090903
|

New tube replacement:
- Open left cover.
- Pull pump tube slightly downwards and at the same time towards the front of the unit to release the tube out of the pump plate holder.
- Remove the old tube from the peristaltic pump rotor.
- Disconnect the tubing at both ends of the tube connectors.
- Connect new tubing to both ends of the connectors.
- Place one end of the tube in the pump plate holder.
- Pull the new tube over the peristaltic pump rotor.
- Pull pump tube slightly downwards and at the same time towards the back of the Interrliner.
Fill and clean
|

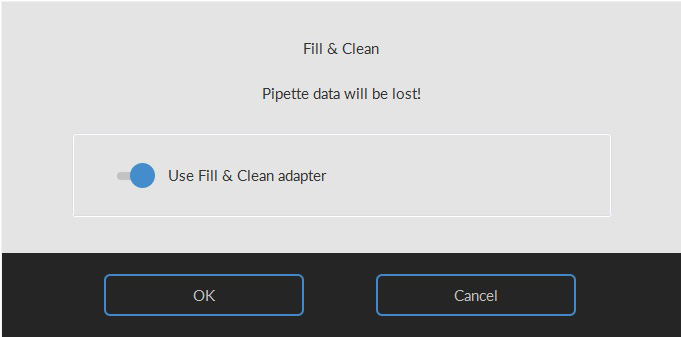
Start Fill and clean procedure:
- Select button OK.
- The needle goes down and the process is started.
- When all the pipettes are filled, the needle goes back to the home position.
- After the Fill & clean process is finished, a notification is given to stop the procedure.
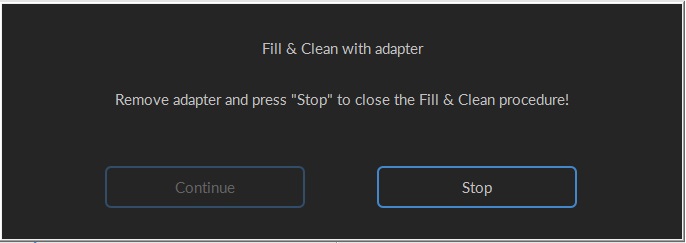
- Remove the adapter from the needle assembly and press "Stop".
The instrument is ready for normal operation.
Sensor checkVacuum pressure check
Fill Stop sensor check
Diluter Start sensor check
Measure sensor check
Temperature sensor check
Diluent flow sensor check
Separator check
|
||||
Clean waste separator and exchange Waste cassette assemblyBe careful, as there may be blood in the cassette. First, make up some disinfectant and put this in the waste separator. Press Prime Disinfectant to pump disinfectant through the pump cassette. |
||||
Clean Separator The waste system must be cleaned before replacing the waste pump cassette.
|
|
|||
Exchange Waste Cassette and blotting washer
|
|
|||
Exchange Pinch valve tube
Replace the pinch valve tube ESRI010246 |
|
Inspect or replace sample probe or outer needle
A faulty or broken needle can cause a fill time-out error or a dilution error.
If necessary replace the sample probe or outer needle.
Check and clean instrument
Prepare disinfectant: (if not already prepared).
This disinfectant is for cleaning of all external parts that are exposed to blood.
- Go to tab [Maintenance] and perform the [End-of-day wash] procedure.
- Check system for leakage.
- Inspect the peristaltic pump tubes and connections for leaks.
- Check that liquid does not run back after the pumps have stopped.
- Clean the outer needle with disinfectant
- Check tubing from the syringe for trapped air bubbles.
- Check Diluent syringe for trapped air bubbles.
- If trapped air bubbles are found, go to tab [Maintenance], click button [Prime / Clean] and perform the [Prime Diluent/Diluter] function.
- Wipe outer surface and stainless steel plate below the pipettes with disinfectant.
- Check (or replace if needed) two drip trays (ESRI010318)
Exchange air filter
Air filter replacement QWLV040003
- Pull both tube connectors out of the blue disk filter.
- Place new blue disk filter
- Reconnect the tube connectors on the filter
Mechatronics home
Send Feedback
Print
|
Page last reviewed: 31/01/2020 11:09:34 (Version: 2.01 (04-05-2022) MRN-124_2-EN) ©2022 RR Mechatronics |