 Manual home
Send Feedback
Manual home
Send Feedback
 Print
Print
|
|
|
|
|
WI-1215 Level 4 maintenance
Work instruction Number 1215 (PDF) |
|
Page 1 of 4 |
Purpose:Maintenance level 4 |
Safety: Bio Hazard area |
|
Instrument: Interrliner |
Revision: 003, 2019 |
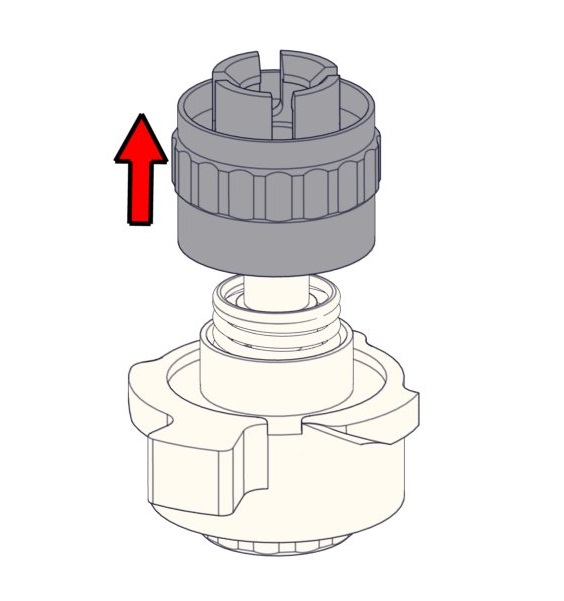
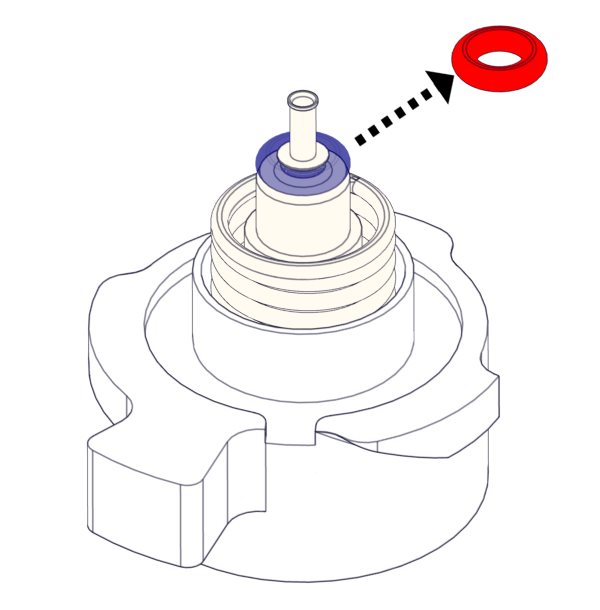
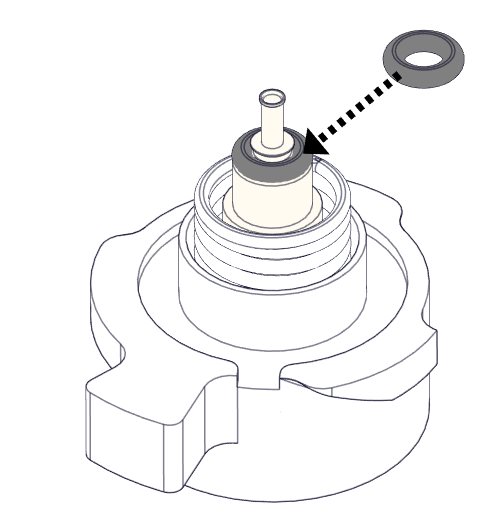
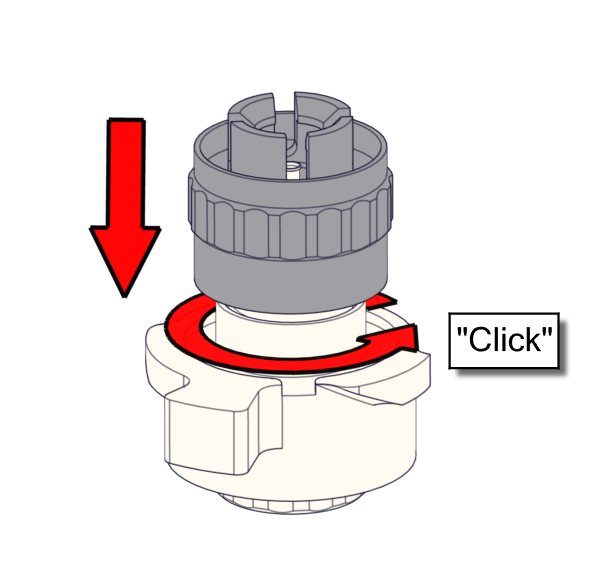
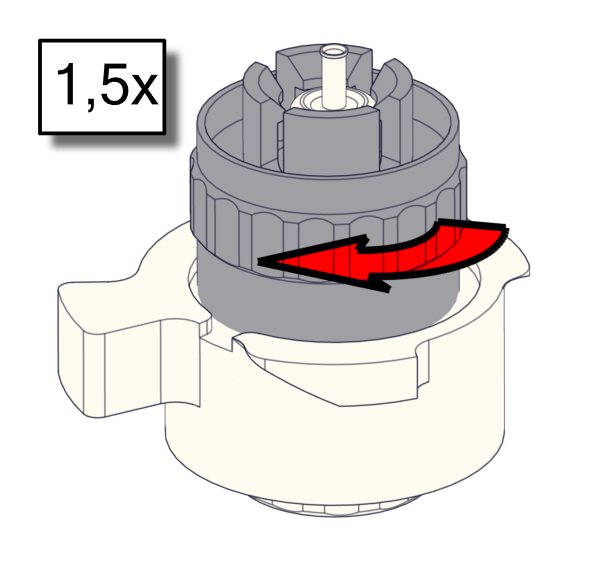
Clean Fill nozzle and exchange O-ring Fill Nozzle
1. |
|
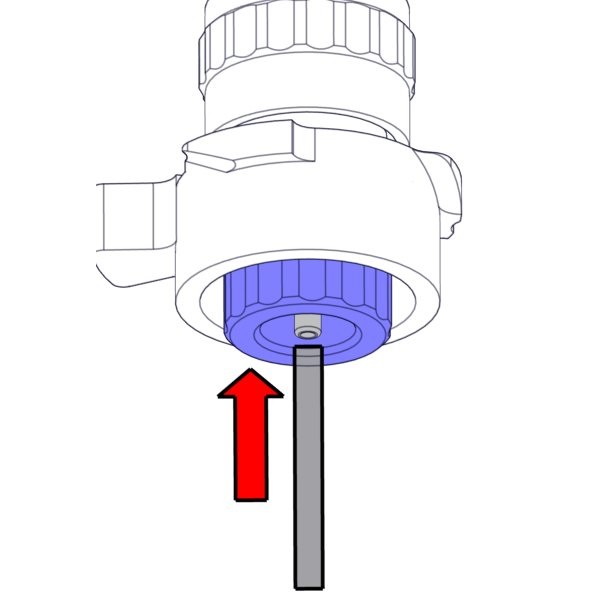
2. |
|
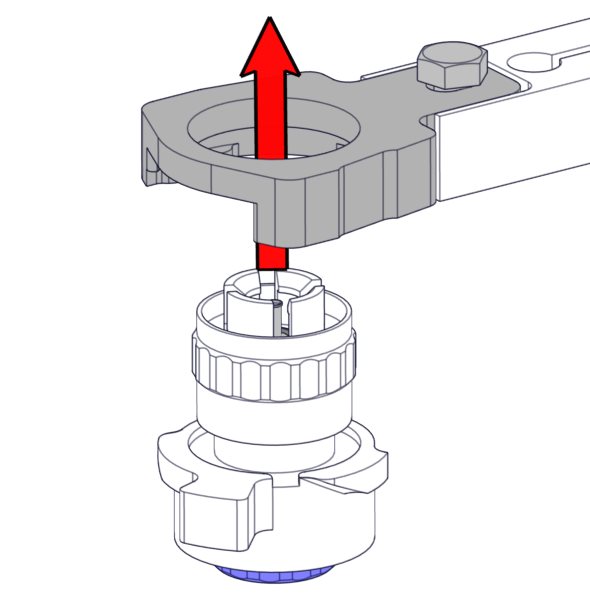
3. |
|
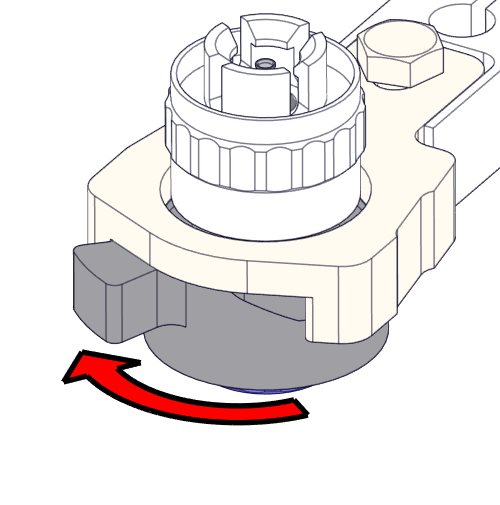
4. |
|
5. |
|
6. Clean fill nozzle The use of a toothbrush and detergent is recommended.
|
||||
7. |
|
8. |
|
9. |
|
|||
10. |
|
11. |
|
12. |
|
|||
13. |
|
|
|
|
|
|||
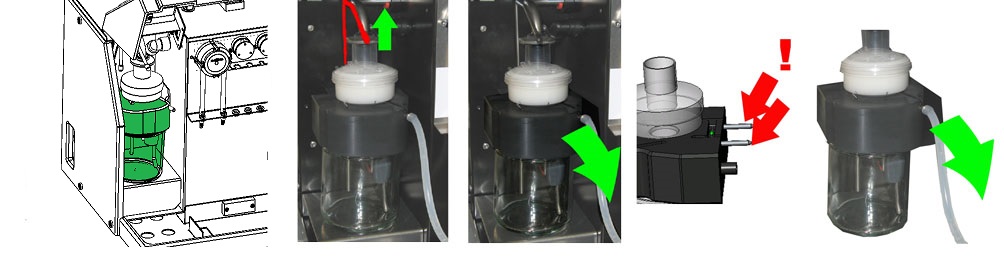
Clean waste separator and exchange filters
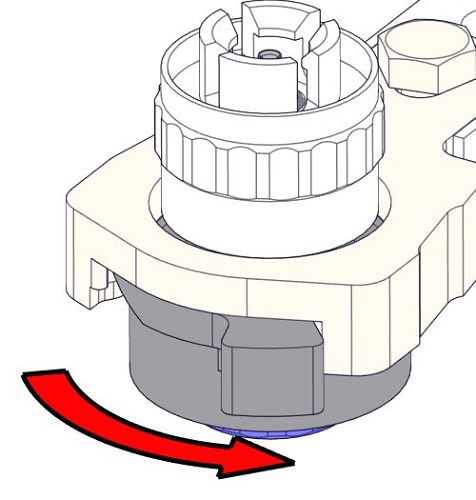
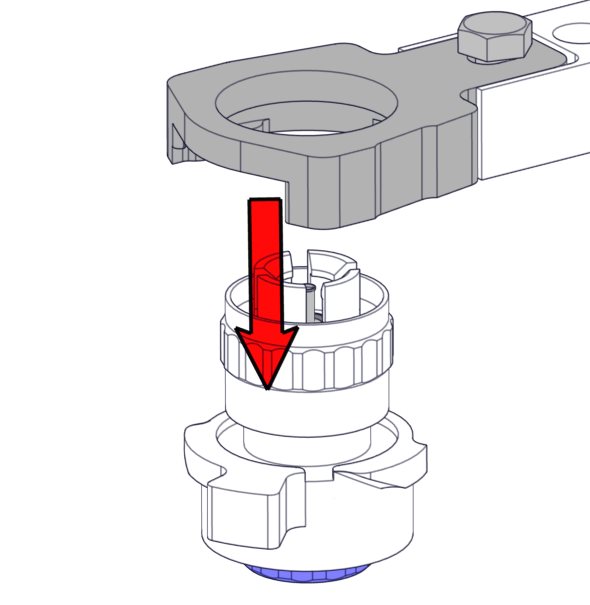
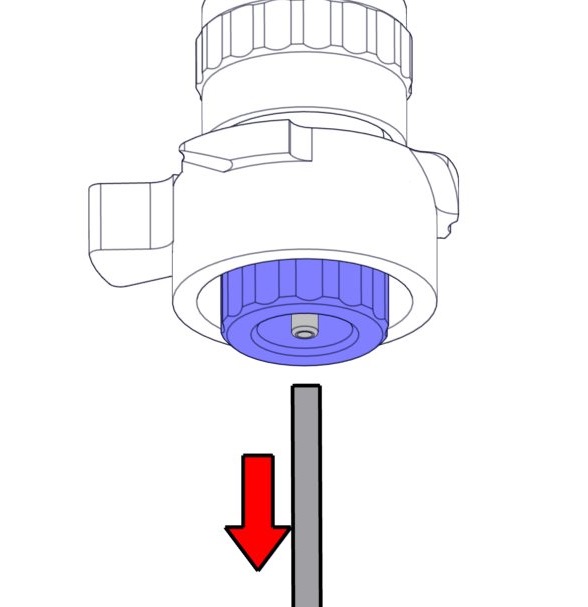
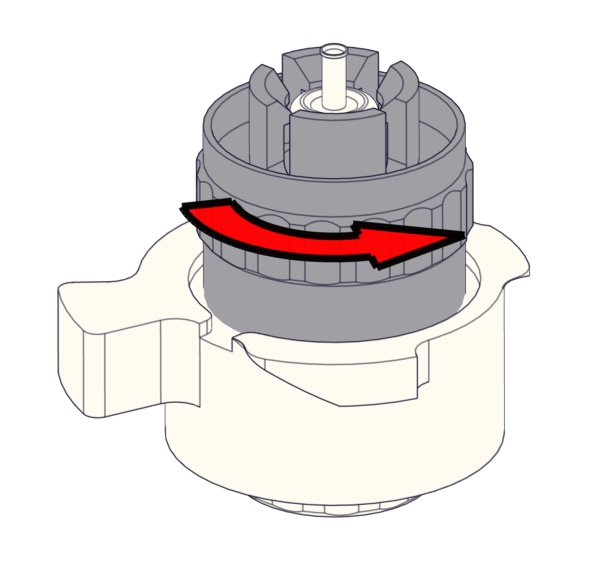
Removing
Cleaning
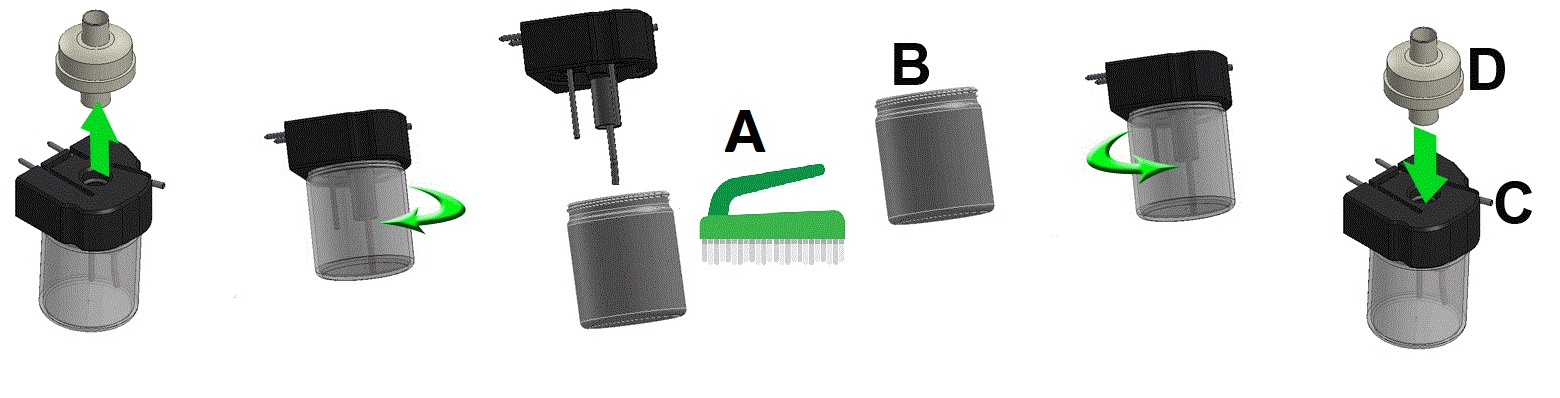
A. Clean all parts with hot water and a brush.
B. Use some acid free vaseline on the screw-thread of the glass jar, the top rim of the glass jar, the O-ring for the HEPA filter and the black PVC pipe on the back.
Replacing
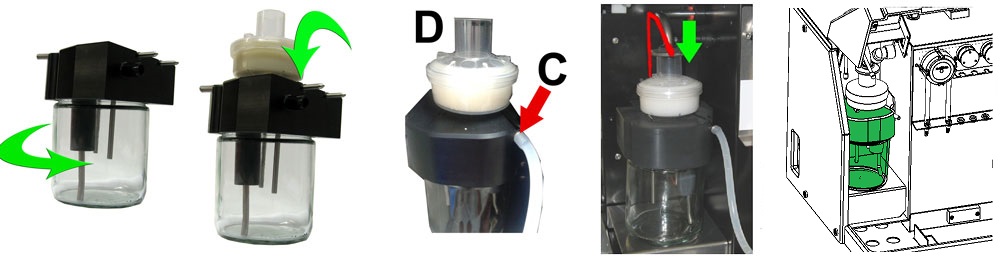
C. If applicable replace the bacterial HEPA filter (For Maintenance Level 4: Exchange filter QWLV040002)
On waste bottle (If used):
Exchange bacterial filter QWLV040001 on the waste bottle assembly.
Exchange Rinse and Saline tube assembly |
||
New rinse pump tube assembly ESRI090902.
|
|
New saline pump tube assembly ESRI090903
|

New tube replacement:
- Open left cover.
- Pull pump tube slightly downwards and at the same time towards the front of the unit to release the tube out of the pump plate holder.
- Remove the old tube from the peristaltic pump rotor.
- Disconnect the tubing at both ends of the tube connectors.
- Connect new tubing to both ends of the connectors.
- Place one end of the tube in the pump plate holder.
- Pull the new tube over the peristaltic pump rotor.
- Pull pump tube slightly downwards and at the same time towards the back of the Interrliner.
Fill and clean
|

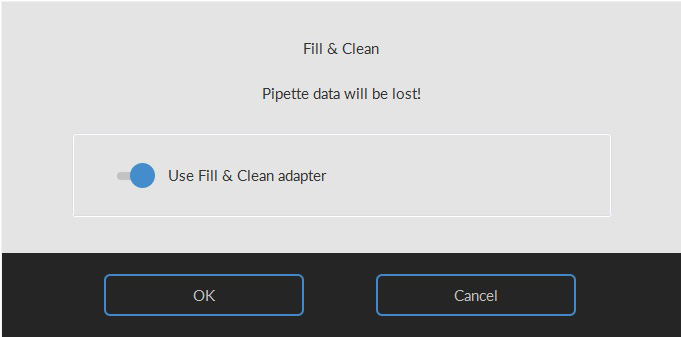
Start Fill and clean procedure:
- Select button OK.
- The needle goes down and the process is started.
- When all the pipettes are filled, the needle goes back to the home position.
- After the Fill & clean process is finished, a notification is given to stop the procedure.
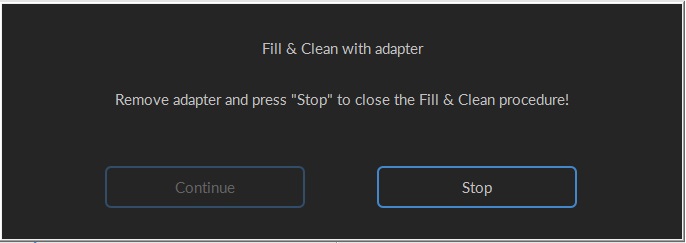
- Remove the adapter from the needle assembly and press "Stop".
The instrument is ready for normal operation.
Sensor Check
Vacuum pressure check
- Go to tab Maintenance -> Check sensor. Select Check Flow sensor box.
Flow: 0980 ± 60 Abs: 0320 ±10
If the flow is not in range there might be a blockage in the vacuum flow line to the flow sensor.
Fill Stop sensor check
- Go to tab Maintenance -> Check sensor. Select Check Fill stop sensor box.
Fill stop sensor FS 90..140..165
Diluter Start sensor check
- Go to tab Maintenance -> Check sensor. Select Diluter start sensor box.
Diluter start sensor 400-550-700
Measure sensor check
- Go to tab Maintenance -> Check sensor. Select Check measure sensor box.
Measure sensor MS 50 ±10
Temperature sensor check
- Go to tab Maintenance -> Check sensor. Select Check Temperature sensor box.
Temperature sensor TS [Room temperature]
Diluent flow sensor check
- Go to tab Maintenance -> Check sensor. Select Check Diluent flow sensor box.
Press test. When test is finished, signal Down and signal Up must be green.
Separator check
- Go to tab Maintenance -> Check sensor. Select Check Separator sensor box.
Separator sensor <200 600 >700
Inspect or replace sample probe or outer needle
Inspect needle condition. If necessary replace the sample probe or outer needle.
Check and cleaning
Prepare disinfectant: (if not already prepared).
This disinfectant is for cleaning of all external parts that are exposed to blood.
- Go to tab [Maintenance] and perform the [End-of-day wash] procedure.
- Check system for leakage.
- Inspect the peristaltic pump tubes and connections for leaks.
- Check that liquid does not run back after the pumps have stopped.
- Clean the outer needle with disinfectant
- Check tubing from the syringe for trapped air bubbles.
- Check Diluent syringe for trapped air bubbles.
- If trapped air bubbles are found, go to tab [Maintenance], click button [Prime / Clean] and perform the [Prime Diluent/Diluter] function.
- Wipe outer surface and stainless steel plate below the pipettes with disinfectant.
- Check (or replace if needed) two drip trays (ESRI010318)
Mechatronics home
Send Feedback
Print
|
Page last reviewed: 31/01/2020 09:03:38 (Version: 2.01 (04-05-2022) MRN-124_2-EN) ©2022 RR Mechatronics |