 Manual home
Send Feedback
Manual home
Send Feedback
 Print
Print
|
|
|
|
|
WI-191 Weekly maintenance
Work instruction Number 258 |
|
Page 1 of 3 |
Purpose: Weekly maintenance |
Safety: Bio Hazard area |
|
Instrument: Interrliner |
Revision: 001, 2019 |
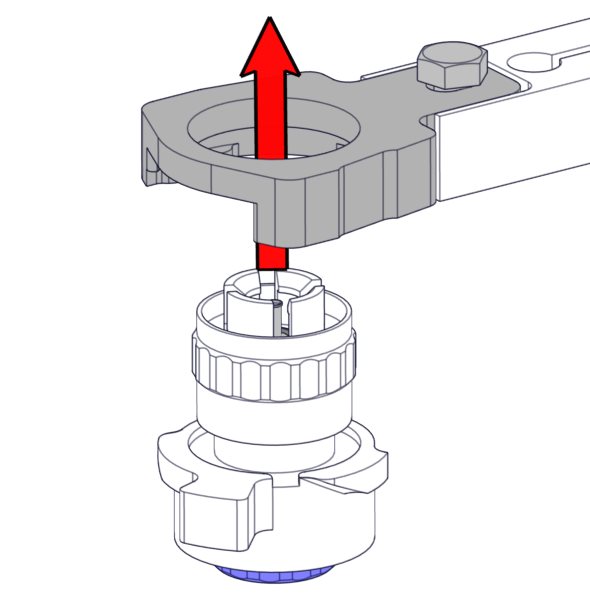
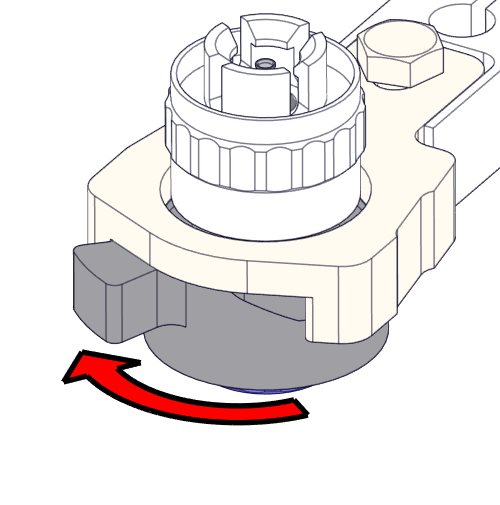
Clean Fill nozzle
1. |
|
2. |
|
3. |
|
|||||
4. |
Clean fill nozzle The use of a toothbrush and detergent is recommended.
|
|||||||||
5. |
|
6. |
|
7. |
|
|||||
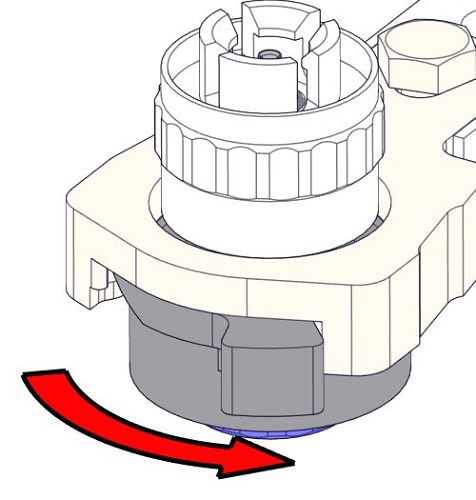
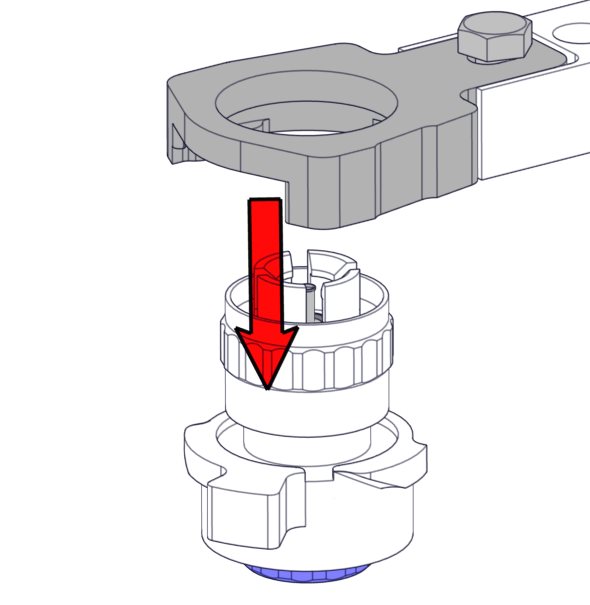
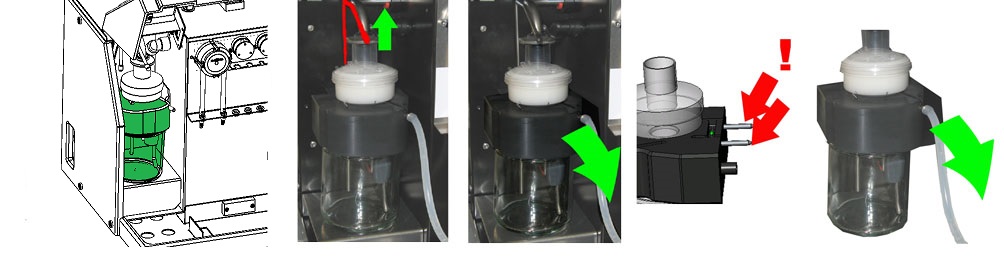
Clean waste separator
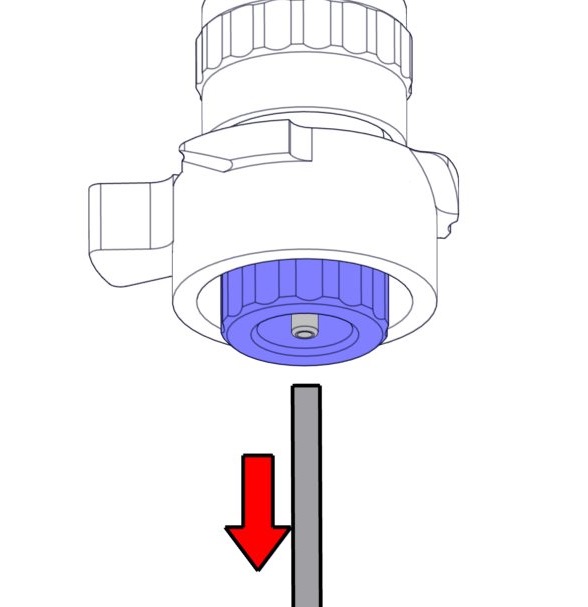
Removing
Cleaning
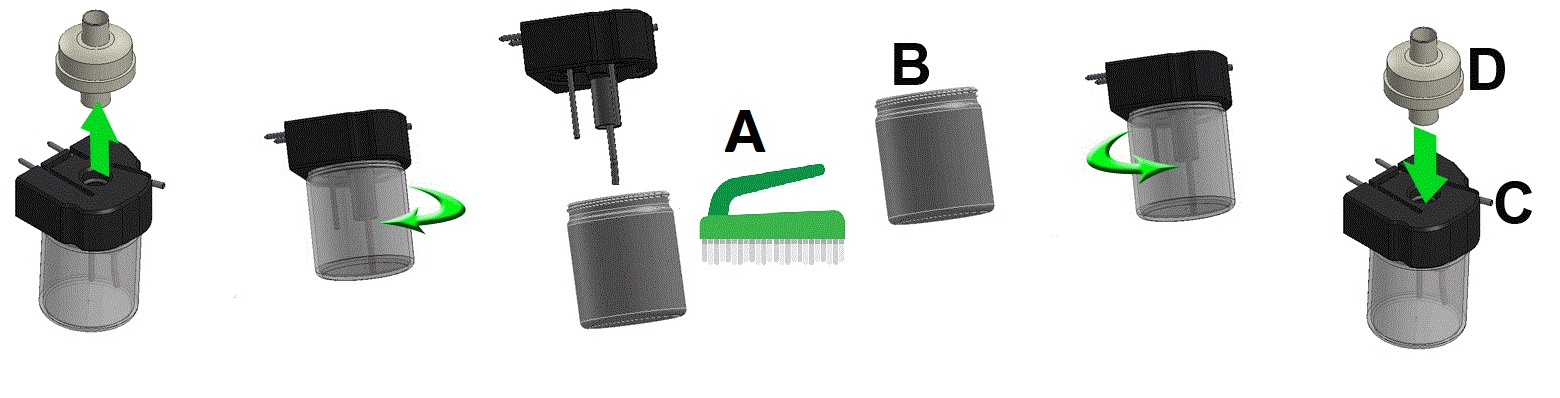
A. Clean all parts with hot water and a brush.
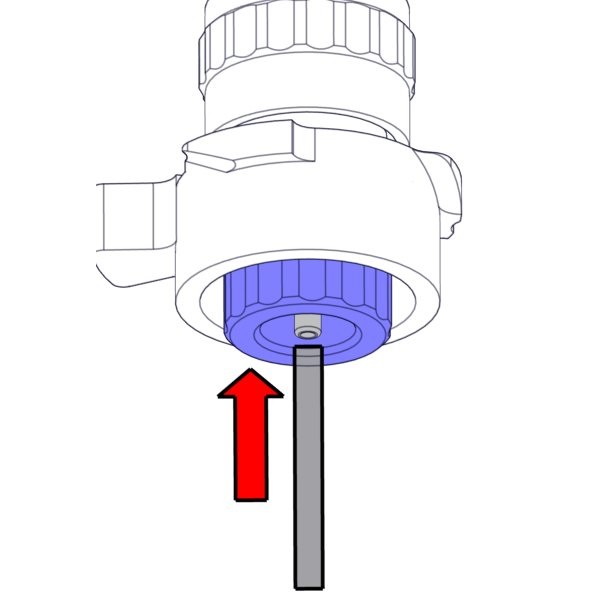
B. Use some acid free vaseline on the screw-thread of the glass jar, the top rim of the glass jar, the O-ring for the HEPA filter and the black PVC pipe on the back.
Replacing
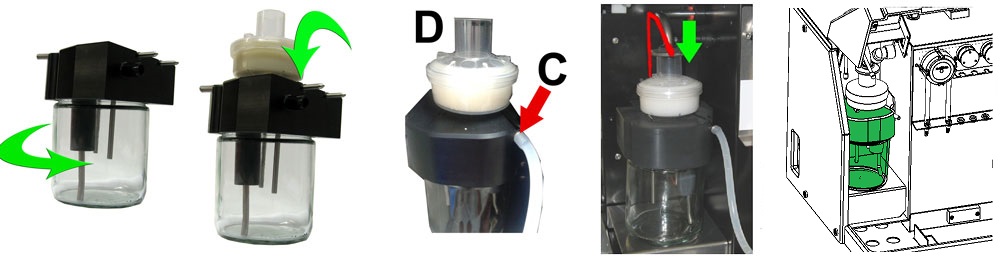
C. If applicable replace the bacterial HEPA filter (For Maintenance Level 4: Exchange filter QWLV040002)
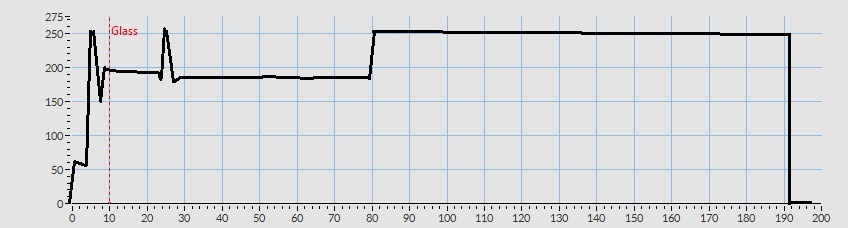
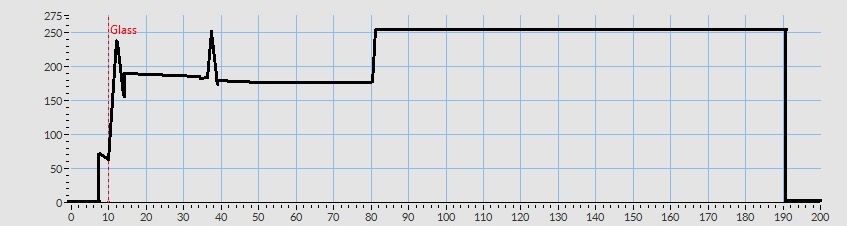
Check sensors
When a test pipette is installed at the measuring position the result of the test pipette is displayed in the field "ESR (mm)".
|

Inspect or replace sample probe or outer needle
Inspect needle condition. If necessary replace the sample probe or outer needle.
Check and clean instrument
Prepare disinfectant: (if not already prepared).
This disinfectant is for cleaning of all external parts that are exposed to blood.
- Go to tab [Maintenance] and perform the [End-of-day wash] procedure.
- Check system for leakage.
- Inspect the peristaltic pump tubes and connections for leaks.
- Check that liquid does not run back after the pumps have stopped.
- Clean the outer needle with disinfectant
- Check tubing from the syringe for trapped air bubbles.
- Check Diluent syringe for trapped air bubbles.
- If trapped air bubbles are found, go to tab [Maintenance], click button [Prime / Clean] and perform the [Prime Diluent/Diluter] function.
- Wipe outer surface and stainless steel plate below the pipettes with disinfectant.
- Check (or replace if needed) two drip trays (ESRI010318)
Mechatronics home
Send Feedback
Print
|
Page last reviewed: 10/02/2020 09:44:32 (Version: 2.01 (04-05-2022) MRN-124_2-EN) ©2022 RR Mechatronics |