 Manual home
Send Feedback
Manual home
Send Feedback
 Print
Print
|
|
|
|
|
Replacement sensor-spot
For Oxygenscan option only
The sensor-spot has to be replaced regularly due to wear.
To replace the pO2 sensor spot and update the calibration file:
- Gently, but forcefully push the sensor spot with your finger out from the inside of the cup.
- Replace the spot by a new one provided in a black plastic pouch by pressing it into the outside of the cup
- A new sensor spot is accompanied by a data file containing the calibration data of the new spot. Download the calibration file from the Lorrca website.
https://support.rrmechatronics.com/index.php/home/lorrca/po2s-luminophore-batch-information/
This file must be placed in the main directory C:/Lorrca MaxSis/. The old data file should be moved to a separate directory where the old data files of the used spots are stored (this might be useful in the future) - Start software and select Hardware settings on tab Lorrca Settings, screen Instrument settings appears:
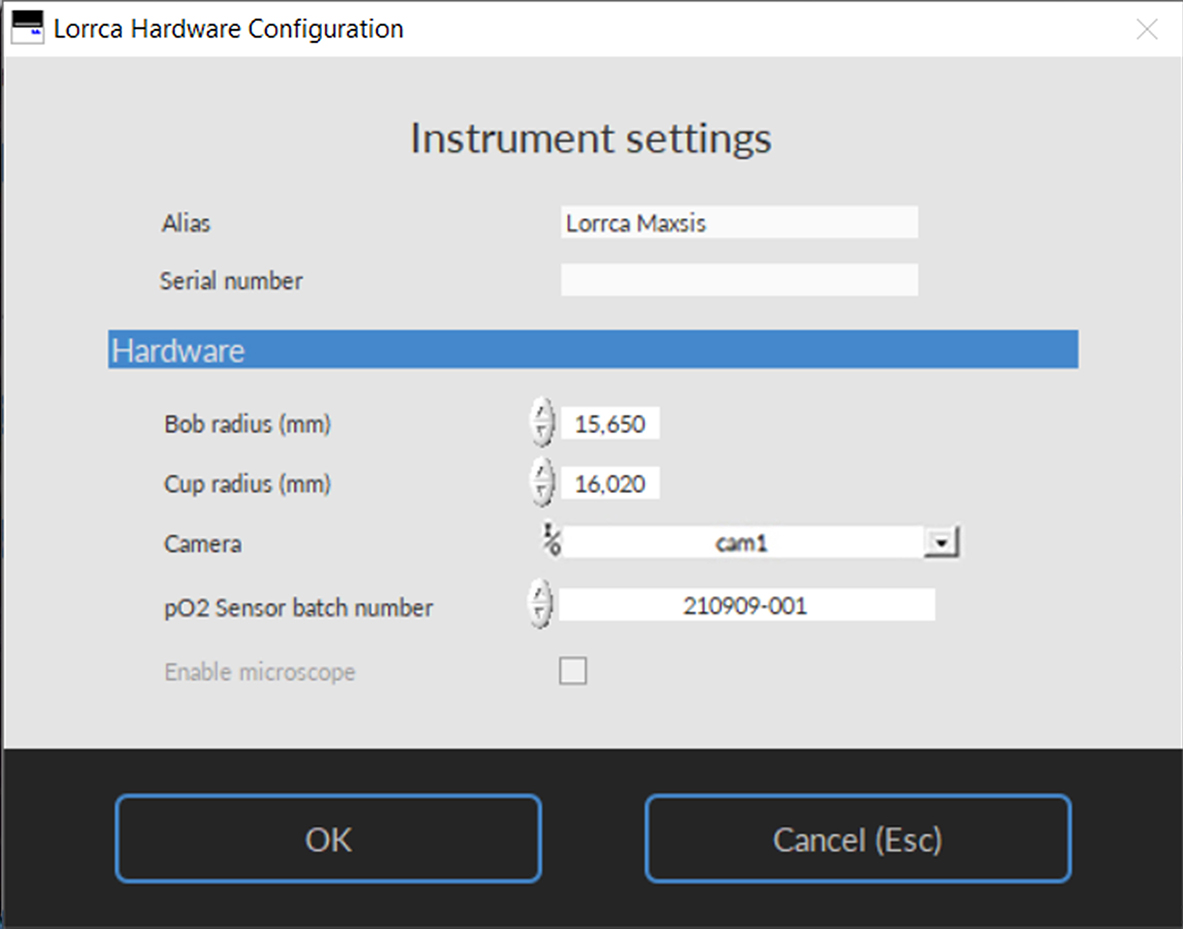
- Select at PO2 Sensor batch number the correct calibration file, which is given with the sensor-spot.
If the new calibration file cannot be found after replacement of the sensor-spot, the following warning is given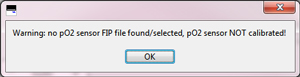
Press OK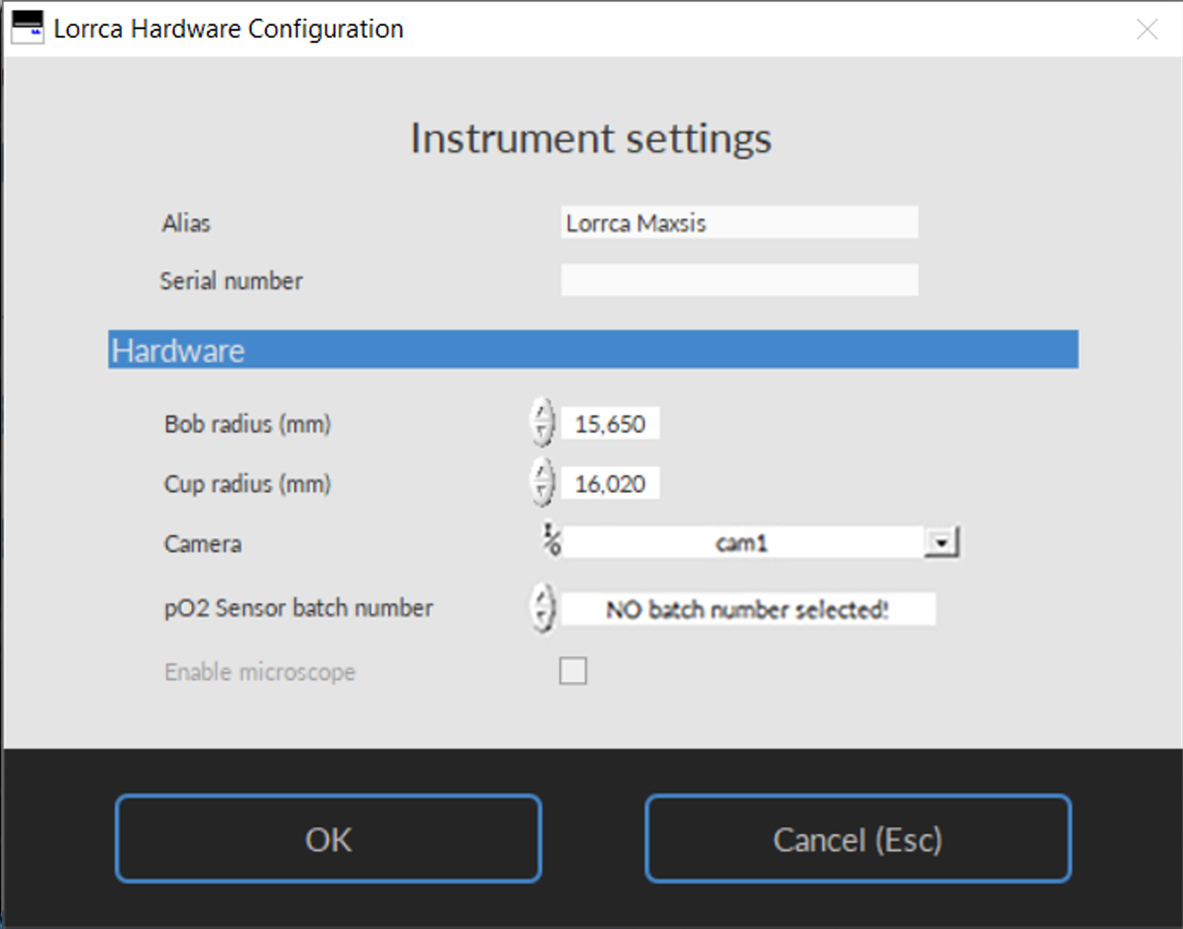
- When the Lorrca program is restarted it will notice that the original sensor spot datafile is missing. The new file has to be linked on the Instrument settings screen (via Main screen -Lorrca settings - Hardware settings. On this screen can the current sensor spot data file be selected.
The self-check is normally performed each week, but can postponed for one week.
If Step 2 of the self-check reads 0 mmHg, the pO2 sensor spot is likely misaligned with the fiber-optic cable and must be adjusted. Adjustment is done by rotating the cup relative to its holder.
ÿØÿà
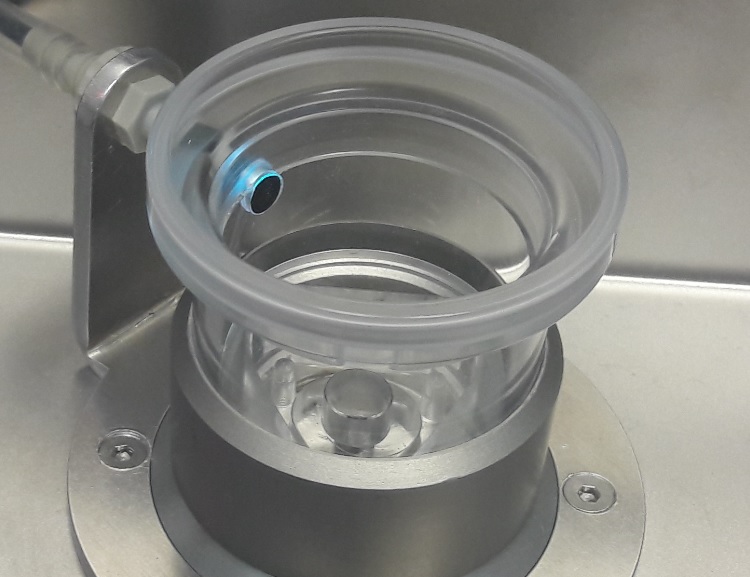
With the pO2 sensor spot removed and the cup sent to the home position, the fiber optic cable is visible through the sensor spot hole. This alignment is critical to accurately measure the pO2 sensor spot.
See Also |
Mechatronics home
Send Feedback
Print
|
Page last reviewed: 24/01/2023 13:21:21 (Version: 5.08 (24-04-2023) MRN-231-EN) ©2022 RR Mechatronics |