 Manual home
Send Feedback
Manual home
Send Feedback
 Print
Print
|
|
|
|
|
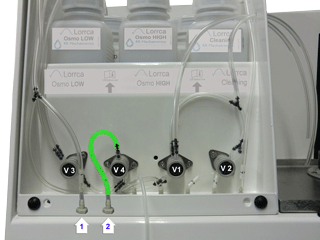
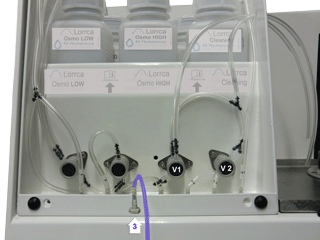
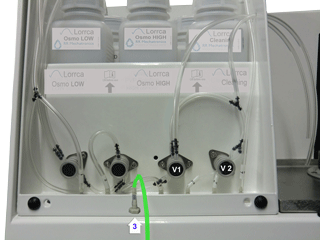
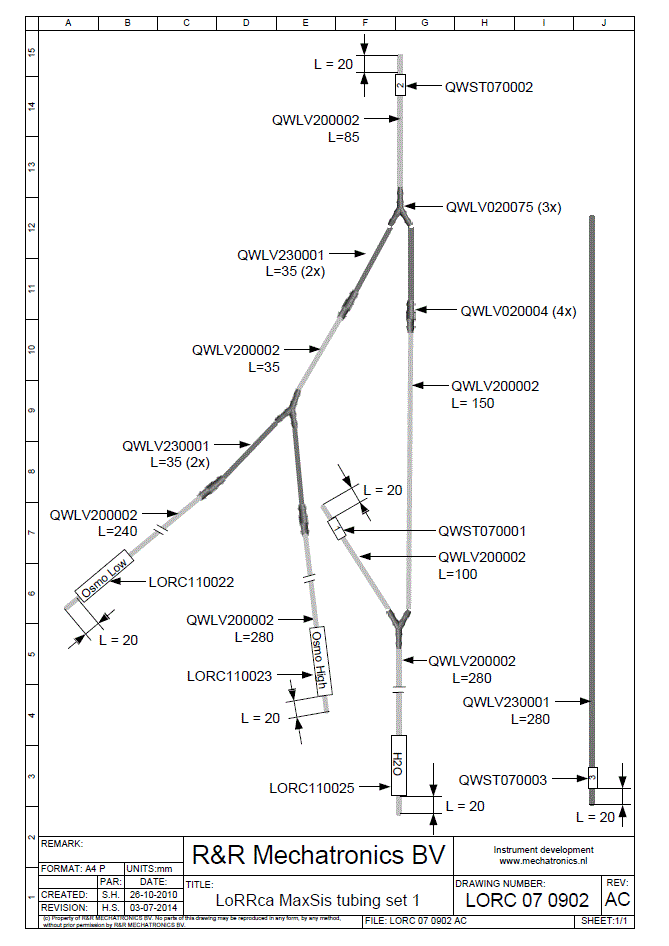
Install LORC070902 tubing set 1
Note: Start to install with the tube end with label 2 which is shown GREEN in the picture.
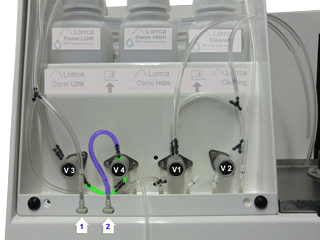
Next picture: The installed tube is now BLUE, continue with the next GREEN tube.
-
|
|
1. Put both small tubes into the pinch valve V4 (short end at the front) 2. Connect tube with label 2 on the connector 2 |
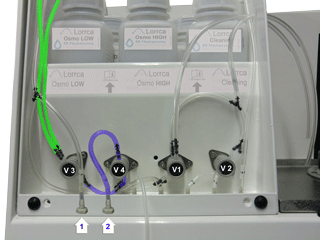
3. Put both small tubes into the pinch valve V3: The tube with label Osmo HIGH is at the back of V3, the tube with label Osmo LOW is at the front of V3 |
|
|
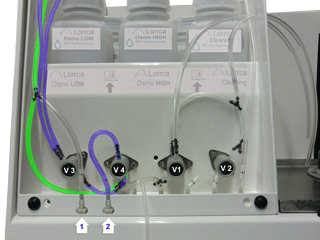
4. Install both long tubes to the PVP bottles. 5. Connect tube "Osmo HIGH" onto the Osmo HIGH bottle |
6. Take connection tube from V4 and connect the tube "H2O" onto the H2O bottle. |
|
|
7. Connect the tube "1" onto connector 1. |
|

Tube to needle assembly
|
|
1. Connect tube with label 3 on the connector 3 |
2. Connect the other end to the needle assembly |
See Also |
Mechatronics home
Send Feedback
Print
|
Page last reviewed: 23/10/2019 10:06:24 (Version: 5.08 (24-04-2023) MRN-231-EN) ©2022 RR Mechatronics |