 Manual home
Send Feedback
Manual home
Send Feedback
 Print
Print
|
|
|
|
|
Replace needle O-ring and check needle (obsolete)

For assembling and disassembling the special needle holder tool TLAX110023 and spanner TLAX110026 are needed.
Needle removal
- Remove drip tray (metal sheet under needle unit, behind door)
- Disconnect both tubes.
- Loosen the knurled knob.
- Remove the complete needle assembly outside the instrument.
- Clean the needle with a disinfectant.
O-ring replacement
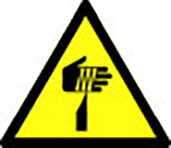
- Use the needle tool TLAX110023 to loosen the outer needle from the needle holder.
Warning: Be aware of spring tension - Store outer needle in tool TLAX110023.

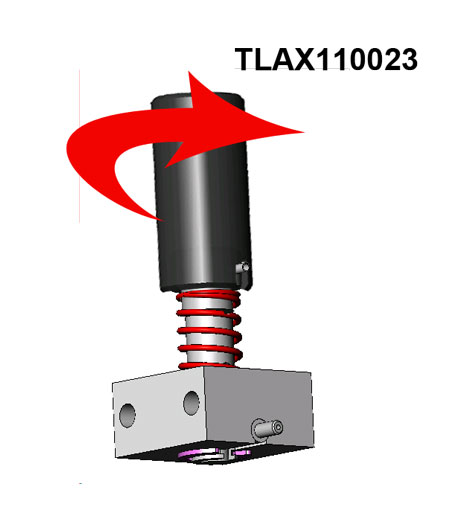
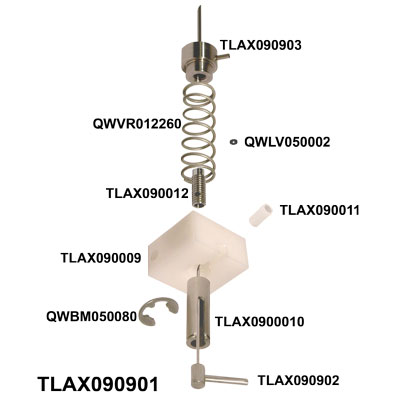
- Remove the spring QWVR0012260.
- Loosen TLAX090012 O-ringscrew from the needle holder.
- Remove the O-ring QWLV050002.
- If needed: Grease the outside of the inner needle base by removing TLAX090011 (use acid free vaseline).
- Fit a new O-ring QWLV050002 carefully, and press the O-ring into the recess.
- Place the O-ring screw over the inner needle so that the internal hexagonal hole is facing the inside of the needle holder.
- The small hole in the O-ring screw should stay about 2 mm above the holder.
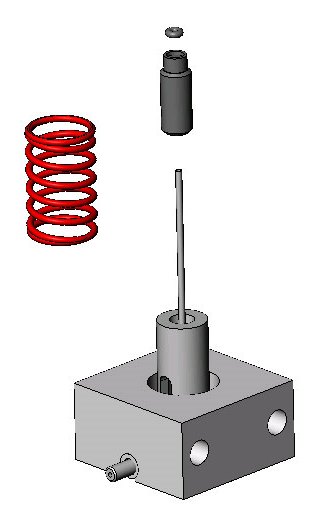
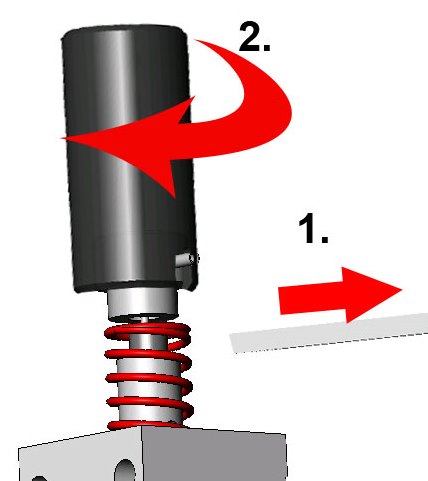
- Place the spring QWVR012260 over the inner needle, insert the special O-ring screw spanner TLAX110026, and tighten the O-ring screw slightly.
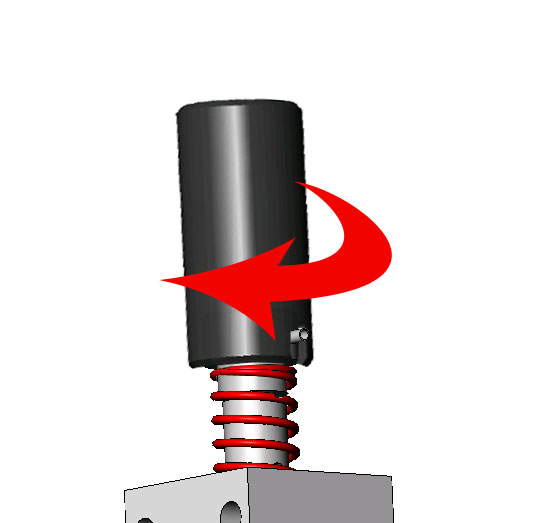
- Hold the needle assembly block tight and turn just the spring clockwise.
- Insert the outer needle carefully into the needle tool TLAX110023, place the inner needle, without damaging the inner needle tip, straight through the outer needle.
- Hold the spanner TLAX110026 in one hand, and tighten (hand-tight) the outer needle by turning the needle tool TLAX110023 clock-wise.
- Remove the spanner TLAX110026, hold the needle assembly by the assembly block, and tighten the outer needle firmly with TLAX110023.
- Check if the pipes are facing the same direction.
- Compress the needle assembly, it should move smoothly.
Check for leakage
- Check the needle assembly for leakage by short-circuiting both ends of the outer needle with a short length of tubing.
- Connect a syringe with air to the inner needle and immerse it in water.
- Pressurize it with the syringe - air bubbles should not be visible.
- Dry all parts.
Needle assembly
- Place the needle back on the instrument.
- Fasten the knurled knob, do not fasten too tight
- Connect both tubes to the needle.
- Place drip tray.
See Also |
Mechatronics home
Send Feedback
Print
|
Page last reviewed: 05/01/2021 16:11:48 (Version: 1.10 (05-09-2022) MRN-174_2-EN) ©2022 RR Mechatronics |